


Repository Link - Use it to deploy yourself!
SmartScreen is a web app inspired by the ‘MagicMirror’ application to show status information. I figured that building an application myself would be a good opportunity to further develop my coding skills. The latest version was designed using JavaScript and HTML so it can be displayed on multiple devices and browsers.
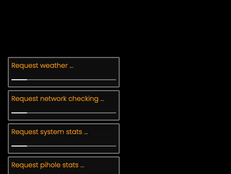
Currently it supports displaying the following information through widgets:
- Time
- Customised user greeting
- Network checking
- Server system stats
- PiHole statistics
- Weather
 Demo of SmartScreen
The below contains a breakdown of the project with some reflections at the end.
Architecture
Initial design phase
Initially version 1 of the project was powered by Python with a front end written in Tkinter. Tkinter was too inflexible and did not provide an easy method for drawing dynamic text and images on screen. I also experienced weird artefact issues when scaling on HiDPI displays.
 Version 1 was plain, grey and boring and suffered from text truncation just to get everything aligned correctly
Realising that plain and grey wasn’t the way forward, I decided to start work on version 2 and fortunately much of the already developed Python code in version 1 could be incorporated into a Flask API, serving the basis for version 2!
Version 2 is a HTML front end paired with JavaScript which calls information from an API, allowing it to run on any modern browser and saves on installing Python requirements like Tkinter. Another advantage was this allowed me to use Docker and wrap any server side requirements into the Docker buildfile, meaning that to run this you literally just need Docker and a browser. Furthermore, unlike my previous Docker Flask projects, where SmartScreen does not require complex C libraries, it was possible to create a custom Docker image based off Alpine linux.
(If you want some fun reading about C issues in Alpine Linux, Alpine does not support glibc which is used by lots of important things and nearly always involves iffy work-arounds in Alpine. - Google ‘alpine glibc’). I believe this is why I could never get psutil to work from python-pip and had to obtain it from the Alpine package manger, which you can see in the Docker build file.
However, Alpine is popular due to its size, which can be demonstrated by the size of StatusScreen API image, totalling only 75MiB!
v2_api latest 598edf61072a 8 weeks ago 75MB
My Debian based Docker Flask images typically reach ~475MiB.
Modular Widgets:
As I wrote the project, I wanted it to be as modular as possible. Each widget has its own corresponding JavaScript file and functions which get loaded in the HTML.
   <!--Import JS for widgets-->
   <script src="js/conf.js"></script>
   <script src="js/shared_funcs.js"></script>
   <script src="js/index.js"></script>
   <script src="js/weather.js"></script>
   ....
Each js file has independent function names and variables, allowing tuning of widget properties, such as display colours and refresh time. It also allows anybody who wishes to contribute with the project an easy path to add extra widgets, providing they have a self contained js file.
Server / Client Setup
One design choice was that a single API server should be capable of serving multiple SmartScreen displays. This was achieved by storing important settings (such as API keys) within a JSON object, server side. This allows the SmartScreen API server to make any API requests on behalf the the Web Browser, instead of designing the JavaScript to make API calls directly to these remote sources, such as weather info. When it came to implementing a network checking widget, this architecture choice was also required so that the SmartScreen API server can send ICMP packets out to other devices on the network to check their status.
However, some configuration is stored locally. For example, the location of widgets is stored within browser cookies which means that different endpoints can have different widget positions but will all obtain the same static information, such as weather or network information. Widgets which the user has chosen to enable are stored in cookies which allows different endpoints to have different widgets enabled/disabled.
Use of JavaScript setIntervals
Set Intervals are used to configure how often the widget should refresh data. The use of JavaScript’s setInterval was a deliberate design choice. Each time the interval re-calls the function to refresh the data, setInterval actually adds the called function to a ‘queue’ within the browser to be processed. This functionality means that even if widgets are called to refresh data at the same time by the browser, they don’t do this asynchronously at the same time, meaning the SmartScreen API server doesn’t get overwhelmed with simultaneous requests. This is also important if you have multiple displays using the same SmartScreen API server.
Use of HTML Classes
Widgets have a HTML draggable class which can be used programmatically in JavaScript to determine where they are on the page and also makes them draggable across the page. This can be done by looking for all HTML div elements (using document.getElementsByTagName) and then identify those that are the class we’re looking for. This was particularly useful when obtaining positions of widget divs on screen because every widget has a class called applet and then their positions can be locally saved in cookies so that when the page is refreshed, widgets are re-drawn in the same place.
__clock__enabled=true; __clock__pos=629px,1546px;
running document.cookie after the deploying the project shows our local values, including the location of widgets on screen
Page notifications on widget refresh
Page notifications were included to indicate to the user that page widgets are refreshing their data. I documented how this can be achieved with a blog post on how to create banner notifications in Javascript
Aspirations
Add next train times
I researched adding a ’next train time’ widget but the UK rail network doesn’t have a very freely available API. The API for Network Rail (BPLAN) or National Rail (NRE) is email request only and SmartScreen is designed for each user to supply their own API keys. If anybody has any suggestions for APIs which can be used to and are openly available, please let me know or contribute to the project!
Building an enclosure
I’m planning on using a Raspberry Pi and an old monitor to create a suitable enclosure. Watch this space!
Useful references
How to make draggable HTML elements - W3Schools. This was where I began the project when looking into V2 as I figured this would be the most complicated part.
Deploying the project
Docker is used to power the Flask API and satisfy all the Python requirements. Clone the repository and from the root of the repository, start the server with docker-compose build && docker-compose up -d. This should result in a new container named ssapi and ssapache. Visit https://localhost:8089 in your browser of choice to load your new SmartScreen.
In the bottom right, clicking on settings allows you to customise the SmartScreen. This is where you can enable/disable widget features!
EOF
