


Knowledge Required: Low
Tools required: OpenMediaVault (6.0)
OpenMediaVault is a powerful NAS application which allows users to make files available on the network. In my use case, I have used it for some time and needed to migrate data from one drive to another. However, upon migration, despite changing the home folder location within the GUI, the underlying Linux system will not automatically update the location of user’s home folders.
This guide will assist you in migrating your existing user home directories. It assumes that you have already migrated the actual user home folder data from one drive to another.
Get the mount path of your drives
OMV will mount drives to /srv by default. You’ll need to identify the path for both the new drive and the old drive. The easiest way to get the /srv is to have a shared folder on the old drive and on the new drive. If you haven’t created a shared folder on the new drive, doing this will make the process easier.
Go to Storage > Shared Folder:
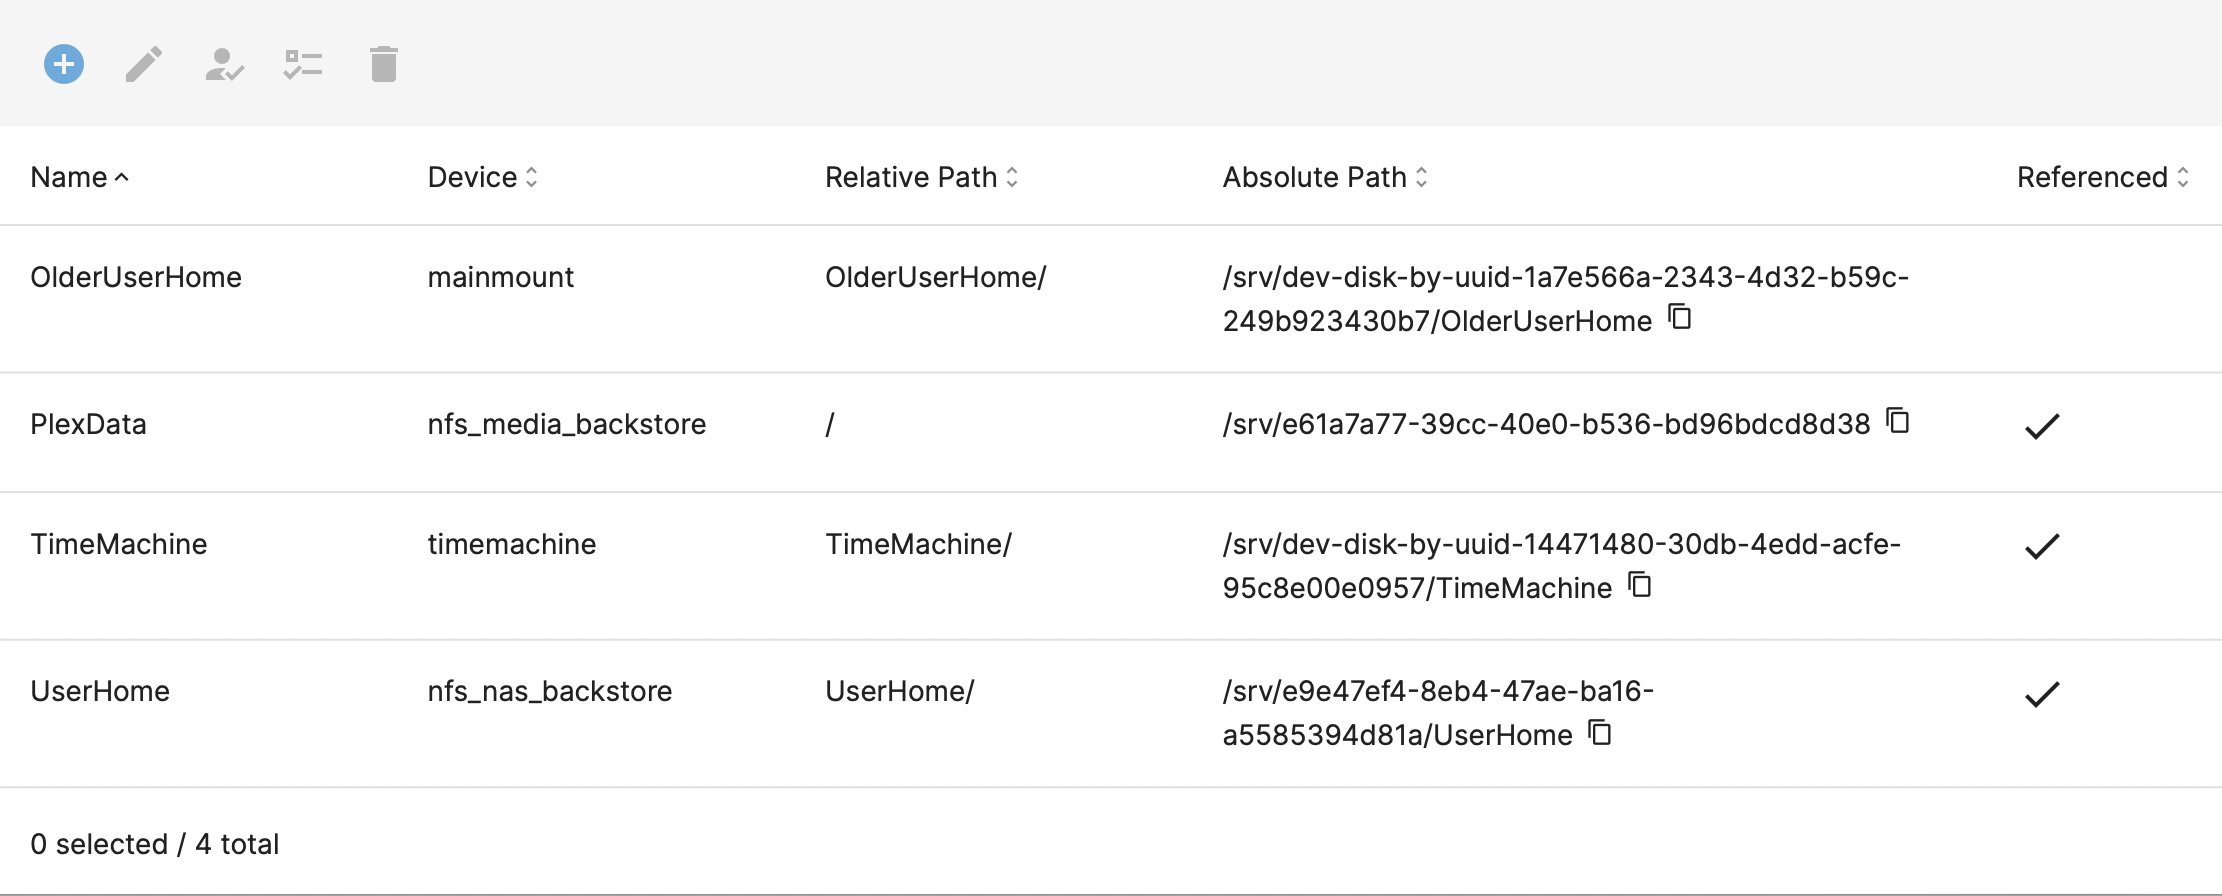
In my setup, you can see that I have created two shared folders for User home directories:
UserHome(this is the new home folder)OldUserHomewhich the old.
By looking under the Absolute Path column, we can see where they are mounted on the system. Take note of both.
In my example:
UserHomeis/srv/e9e47ef4-8eb4-47ae-ba16-a5585394d81aOldUserHomeis/srv/dev-disk-by-uuid-1a7e566a-2343-4d32-b59c-249b923430b7
Migrate Linux Home Folders
As I mentioned, although OMV has the ability to set a default path for home folders (User Management -> Settings) it will not update home folder locations for existing users when this value is changed. In order to do this, we need to make modifications to the underlying Linux system. /etc/passwd is a file in Linux which stores multiple attributes about a user, including their home directory.
I can find all existing users which haven’t had their home folder location updated by looking for instances of the old home folder location. For reference, from the screenshot above, this was:
/srv/dev-disk-by-uuid-1a7e566a-2343-4d32-b59c-249b923430b7/OlderUserHome
You only need the folder name under /srv/. In this case it would resolve to /srv/dev-disk-by-uuid-1a7e566a-2343-4d32-b59c-249b923430b7.
Next, we’ll open an SSH session and find all users where the old home folder location is present:
root@omv01:~# sudo cat /etc/passwd | /srv/dev-disk-by-uuid-1a7e566a-2343-4d32-b59c-249b923430b7/

nathan:x:1000:100::/srv/dev-disk-by-uuid-1a7e566a-2343-4d32-b59c-249b923430b7/UserHome/nathan:/bin/bash
In this example, we can see the user nathan still has a reference to the old location for home folders.
Update /etc/passwd:
If you have multiple affected users, we can use one command which will replace all instances of our old location with our new one.
Using the same process as before, I can work out the location for the new /srv is /srv/e9e47ef4-8eb4-47ae-ba16-a5585394d81a. In the command we’re going to use, we can just use the folder IDs of the mounts within srv as they are unique enough; next, we’ll use sed to update the passwd file.
FIRST LET’S TAKE A BACKUP THOUGH!
Backup your existing passwd file with sudo cp /etc/passwd /etc/passwd.bak
Update all instances of the old home folder location with sed
sudo sed -i 's/dev-disk-by-uuid-1a7e566a-2343-4d32-b59c-249b923430b7/e9e47ef4-8eb4-47ae-ba16-a5585394d81a/g' /etc/passwd
To break this down and make it clear what we’re doing
sudo sed -i 's/<old identifier>/<new identifier>/g' /etc/passwd
Using nathan as an example, we can check the changes have been applied by looking at the home folder location in the updated passwd file
root@omv01:~# sudo cat /etc/passwd | grep nathan
nathan:x:1000:100::/srv/e9e47ef4-8eb4-47ae-ba16-a5585394d81a/UserHome/nathan:/bin/bash
Now just reboot your OMV box and the changes will be applied. If you experience any issues you can copy your old file back with sudo cp /etc/passwd.bak /etc/passwd and then reboot.
EOF
